
Making Horn Buttons
/I have been making buttons from Jacob horns for years but I’m not sure that I’ve shared that process here. Sheep have horns with a bony core that is attached to the skull. The horns don’t shed like antlers do. So the first step to making buttons is to have a horn that has been cut off a sheep and that is normally a sheep that has been butchered. It take awhile for the outer part of the horn to come off the bone.

I usually soak the horns in a bucket of water for a couple of days. It gets smelly and disgusting but hopefully the horn loosens from the bone. If it’s a large horn from an older animal that doesn’t always happen.
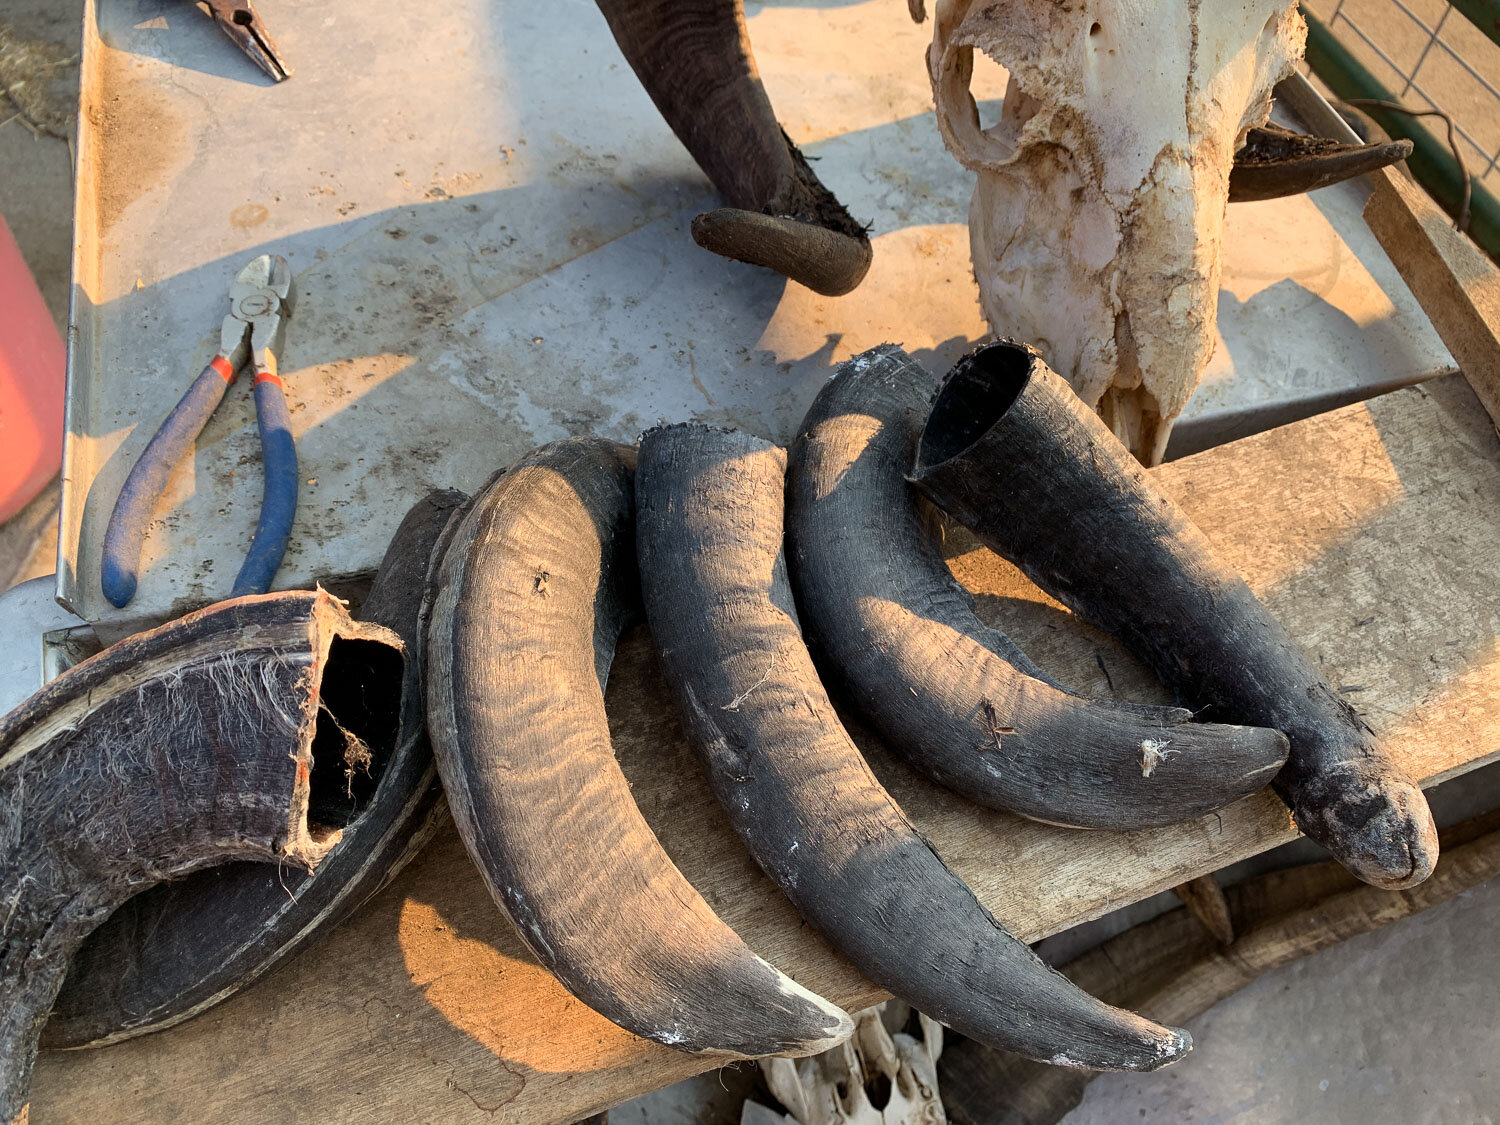
These are some of the horns from the last ram lambs to be butchered. That is a skull from an older ram that was butchered last year. Those horns never did loosen and come off the skull.

I used to make the buttons in the barn, but Dan has been trying to create some space for more of my farm stuff in the garage. He brought the band saw and the sander to the garage and found a spot for them on this tool bench that was something he made for the kids when they were much younger. He added wheels to the bench so that I can move the whole thing outside to work on the horns. It’s a very dusty (bone dust) process and it will be nice to be able to clean off the work surface outside and then wheel the tools back in.

I decided to use one horn to illustrate the process.

The bony core goes up 4 or 5 inches into a horn this size and the end is solid horn. When I cut the horn on the band saw I slice pieces off the solid part and that gives those curvy oval shapes—not very many from this horn. The bony core is where the horn is wider and hollow. I get squares and rectangles from that part of the horn.

The next step is to drill holes. I used to use a Dremel to drill the holes but Dan just got a drill press, and he showed me how to use it.

This is how the buttons look after drilling and before sanding.

This is a batch from the day before to show you that some of the horns are black and white.

Sanding is next.

I can’t sand these perfectly smooth on all surfaces because of the odd shapes, but I try to knock off the loose bits on the outside of the horns and remove the marks left by the saw.
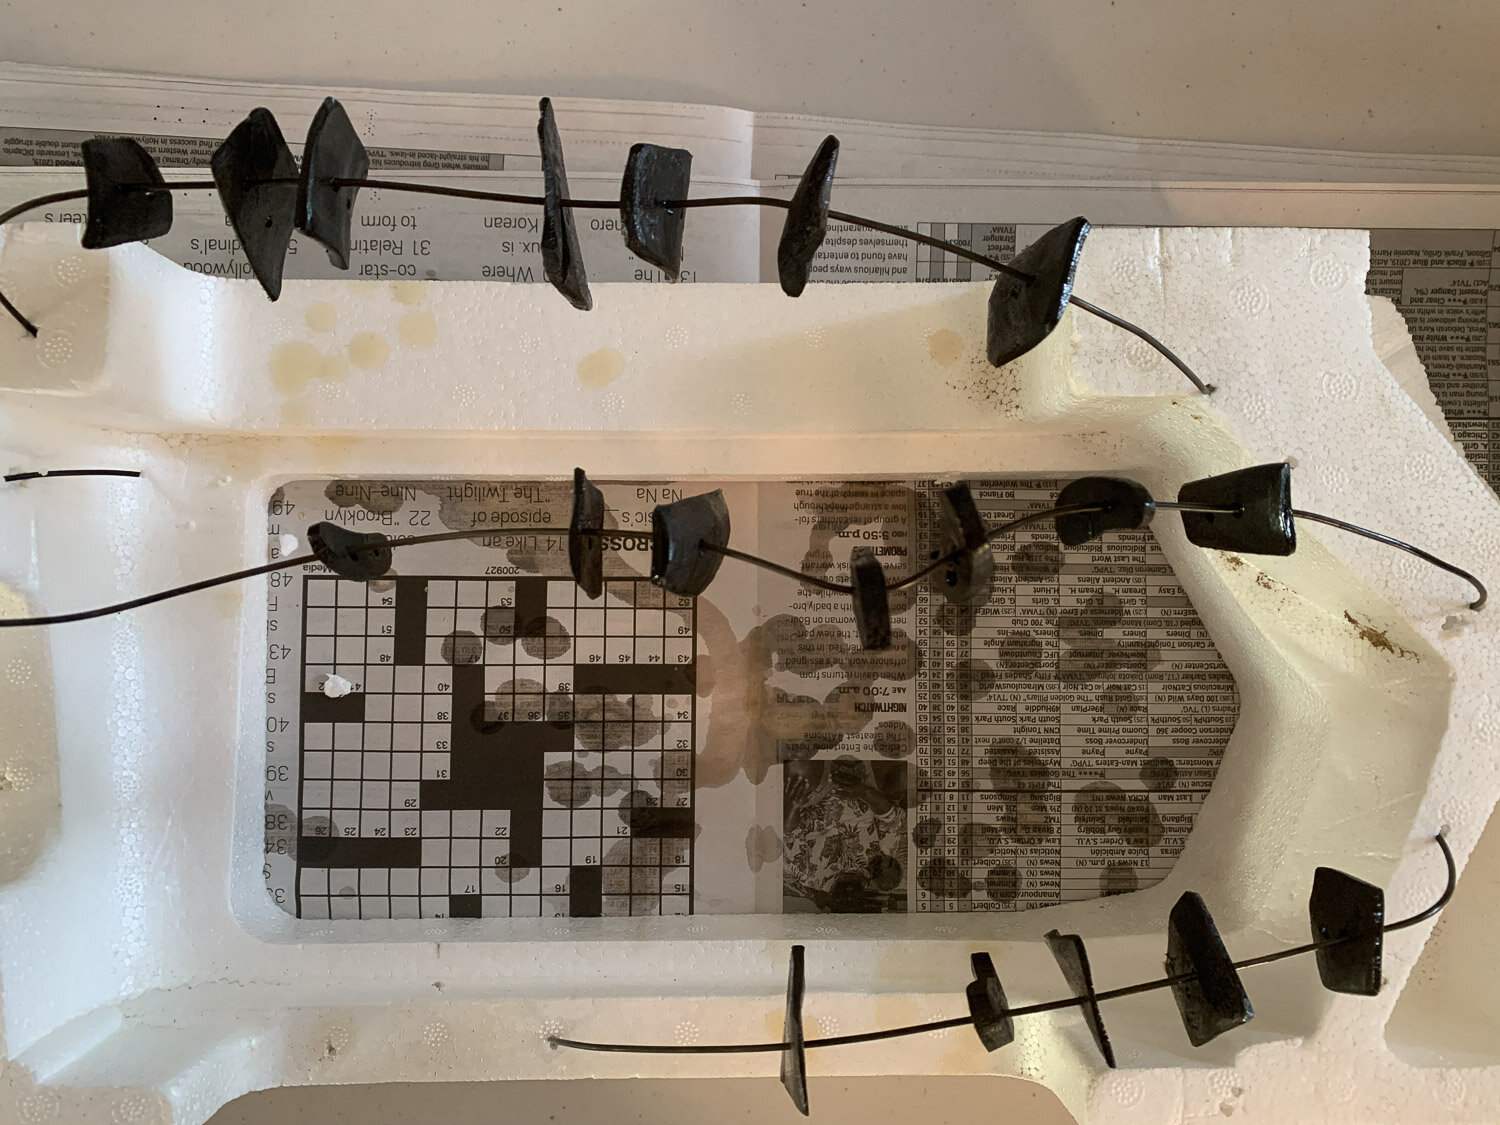
I put a light coat of shellac on the horns to help protect them. I have figured a process that works for me. I put several on a piece of wire and then dip them in the can of shellac. Then I poke the ends of that wire into an old piece of Styrofoam that came from packaging something. (Another reason that I don’t throw things away—at least these get some more use before they end up in a landfill.)

Now the horns are ready to sell. When I go to a show people like to search through the basket of buttons and choose their favorites. If I’m trying to sell these on-line I have to organize them in a way that they can be displayed and they do look nice that way. I have some on the Fibershed Marketplace site and others on my own website.
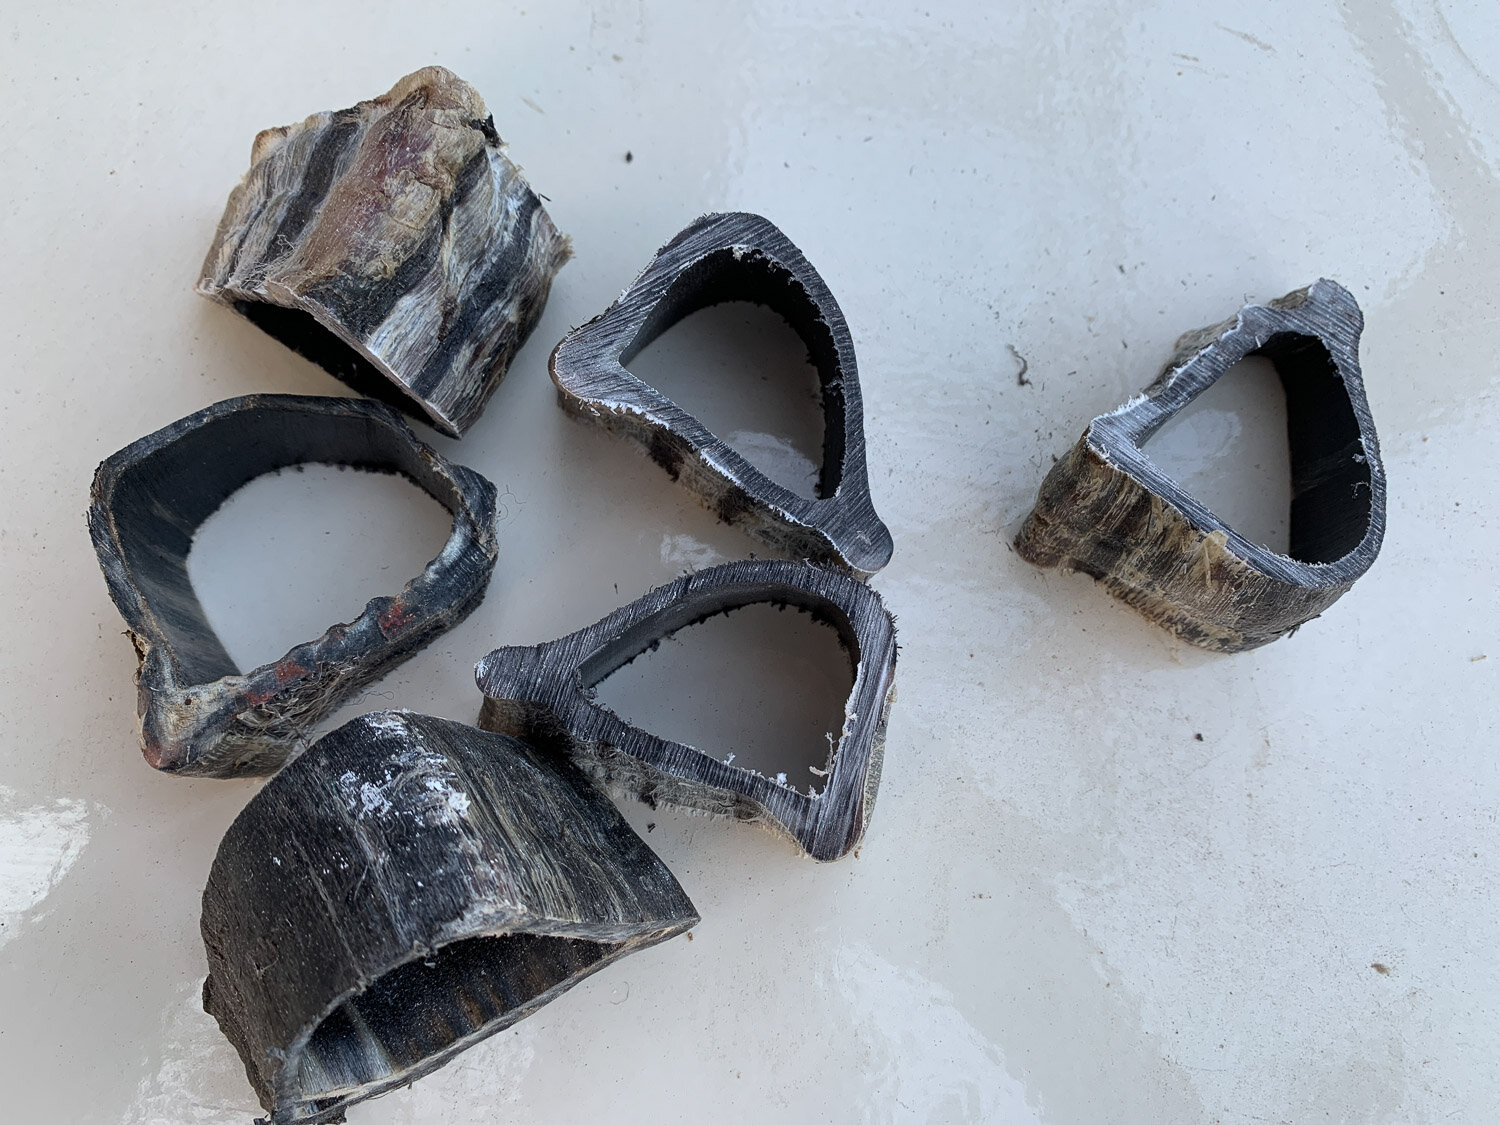
I’d like some feedback here. I cut these off the ends of the horns in the photo near the top of this post. They have not been sanded yet. I’m thinking that they would great napkin rings. Does anyone use napkin rings? Do you even know what napkin rings are? I just googled and found napkin rings so I guess people do still use them. That will be my next project—sand and shellac these and figure out how to offer them for sale.
